NOTE: MUE with Diversion is an experimental feature.
Introduction
Unreal Engine’s Multi-User Editing plugin (MUE) is an amazing resource that allows teams to collaborate in Unreal Engine in real-time. While the plugin is currently in Beta status, I have been able to get some awesome results by just experimenting with the plugin. When combined with Diversion’s version control plugin, you will accelerate your team’s ability to collaborate and iterate on projects.


It is worth noting that MUE only works when workstations are on the same network, so you will need to be in the same digital space as those you are collaborating with. Epic’s official documentation does indicate that MUE may be unstable when working on a VPN, but they also give instructions on how to configure for VPN use.
UE5 Project Setup
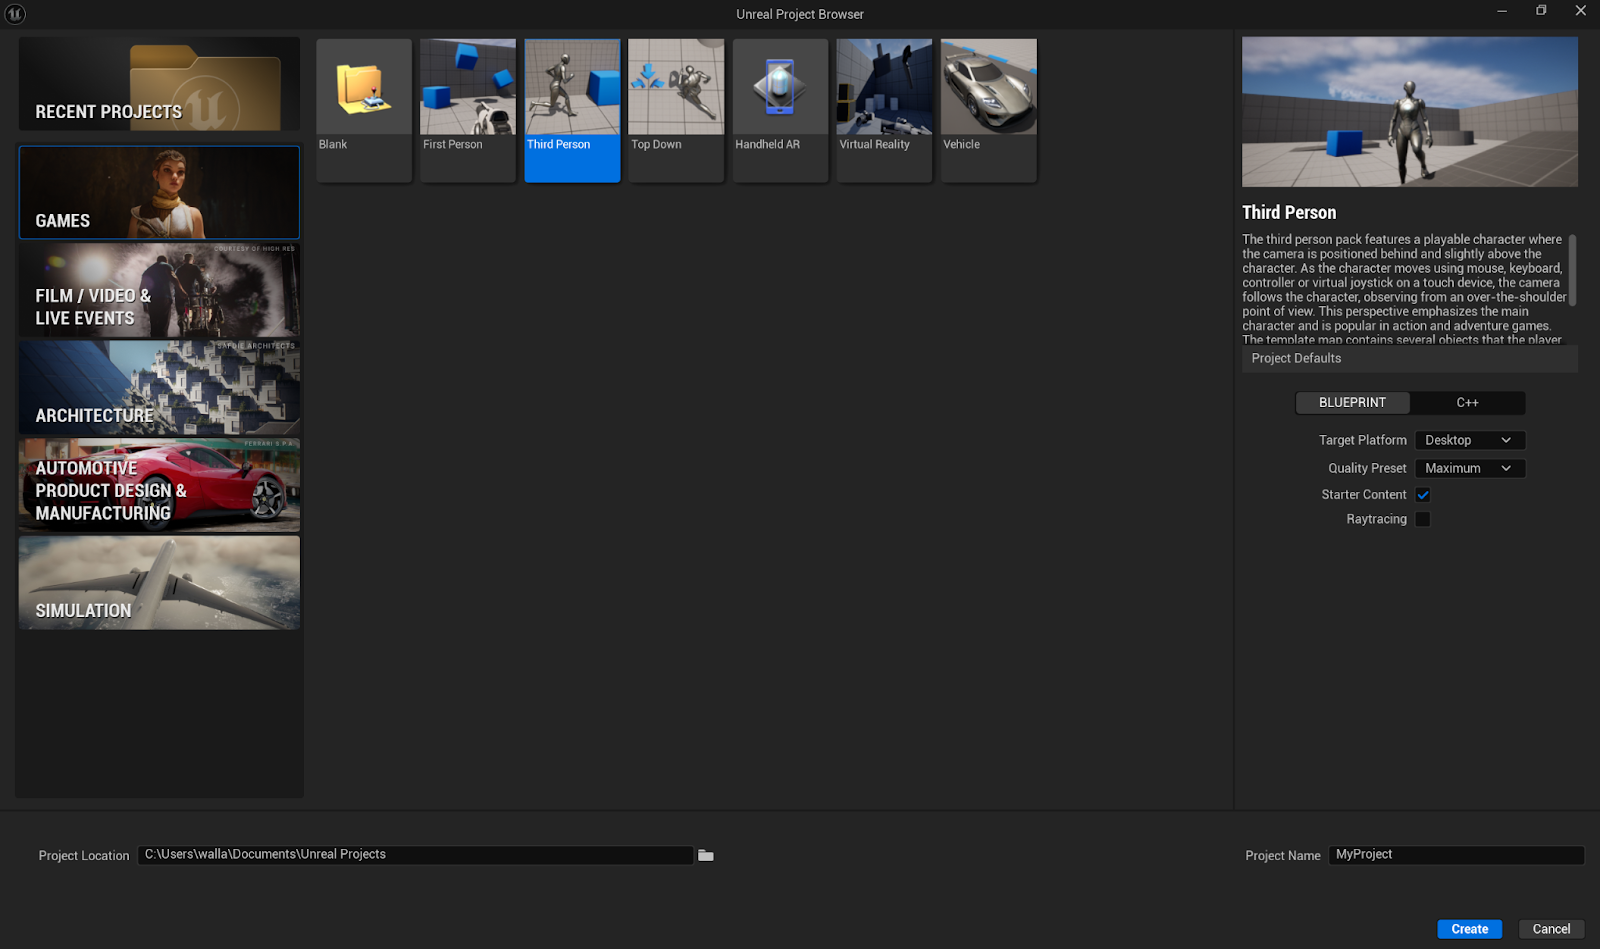
I will be using Unreal Engine version 5.4.4 to demonstrate the capabilities, but this can be done using any project. Let’s start by creating a fresh project using the Third Person project template.
If you haven’t installed the Diversion plug-in, I highly recommend checking it out. This plugin allows the user to manage common source control functions like directly in the Unreal Engine Editor, and I feel it is currently the best solution on the market for version control systems in UE5.
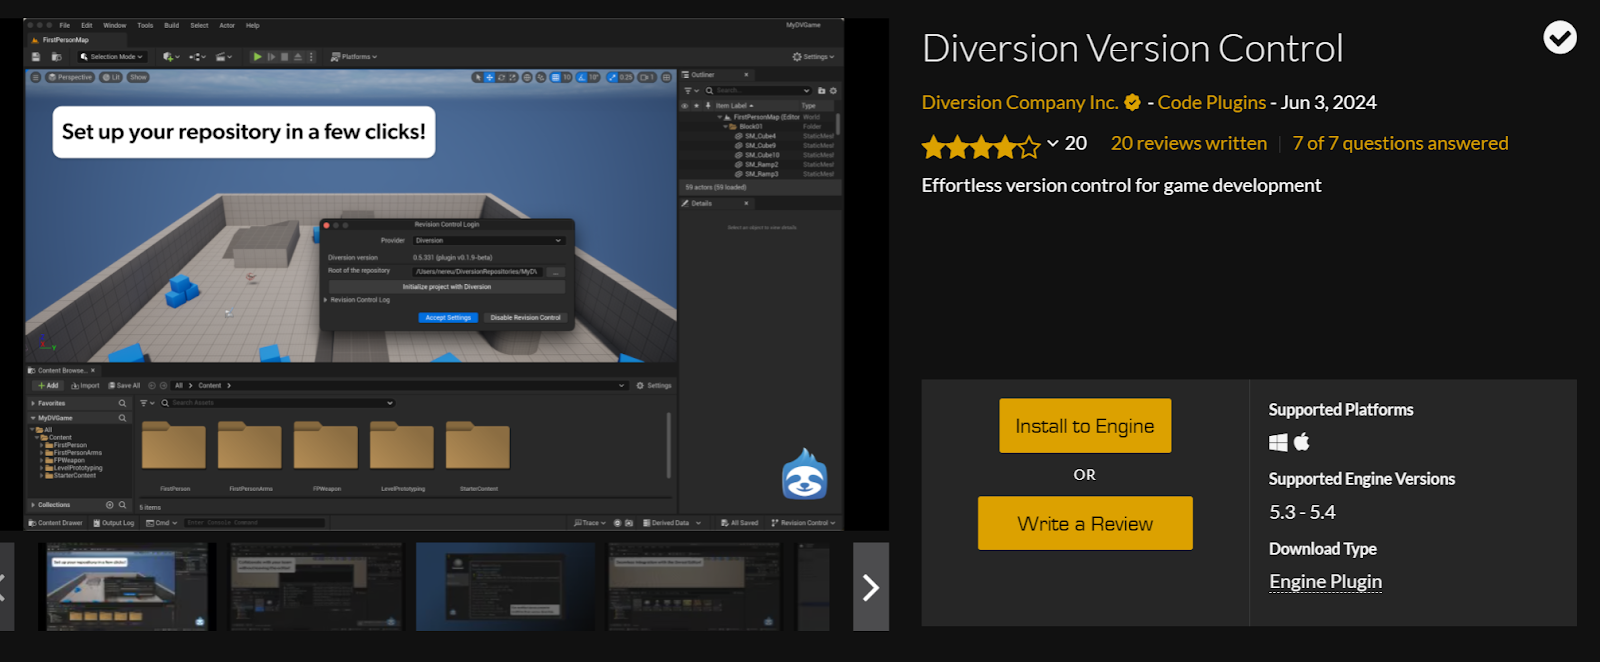
The plugin can be found for free on Fab (previously the Epic Marketplace)). For further information on the Diversion plugin, you can check out the Diversion documentation.
We will also need to install the MUE plugin. This can be done directly from the UE5 editor, as it is part of the standard game engine.
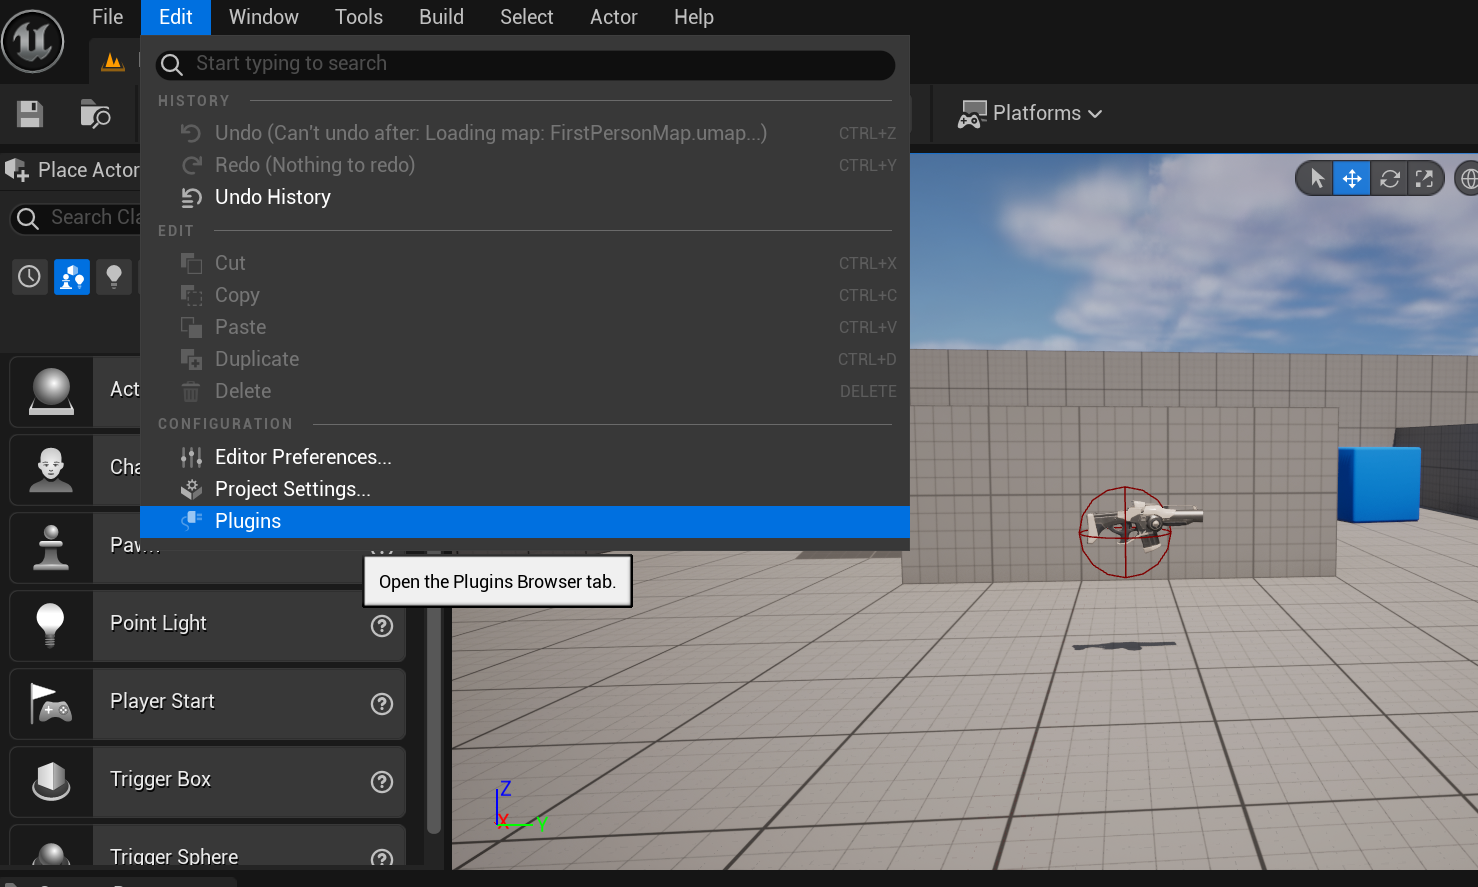
In the UE5 editor, select Edit and then Plugins
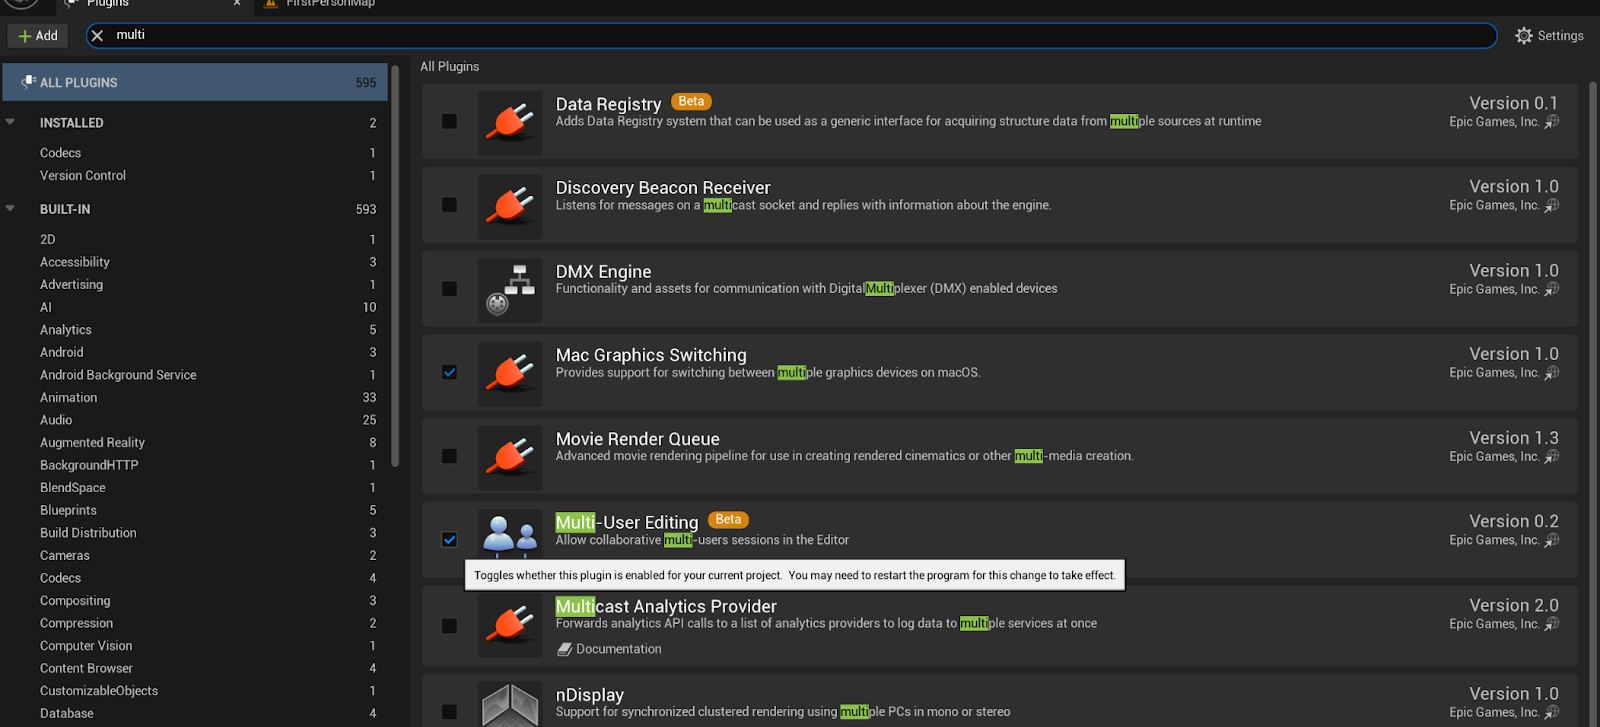
This will open the Plugin manager. We can search for the MUE plugin and then select the checkbox to install the plugin. Since this plugin is still in beta, you will get a warning recommending that you don’t ship your project. Select “Yes.”

You will then get another warning at the bottom of the editor telling you that the editor needs to restart. Let’s install the Diversion plugin first so we only need to restart once.

Search for the Diversion Plugin and select the checkbox there as well.
Restart the editor.
Creating a Diversion Repository
Once the plugin is installed and enabled in Unreal Engine, we can set up our repository directly in Unreal Engine by selecting the Source Control dropdown at the bottom right corner of the editor and selecting “Connect to Revision Control”. Then select Diversion from the Provider dropdown.
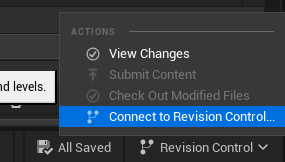
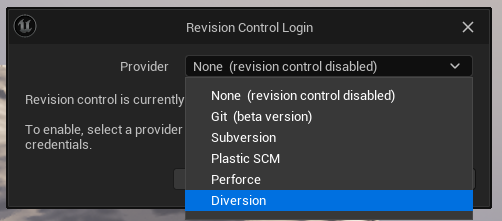
A new window will open. Verify that the file path listed in the Root of the repository is correct. Select Initialize project with Diversion.

Select Accept Settings to close this window. You will get a message that the connection was successful, and the Revision Control will have a green check mark to indicate that your project is now connected to source control.

The project will take some time to upload to the remote repository before you can access it from another computer. You can check on the status of the upload in the Diversion desktop app. When the indicator at the top changes from Syncing to a cloud with a check mark, the upload is complete.

Once this is complete, you can access the project files from another computer. If you are sending to another user (with a different Diversion account), you will need to add them as a collaborator to the project first. In your Diversion desktop app, you can select the dropdown menu from the local workspace and then select Repo Collaborators.
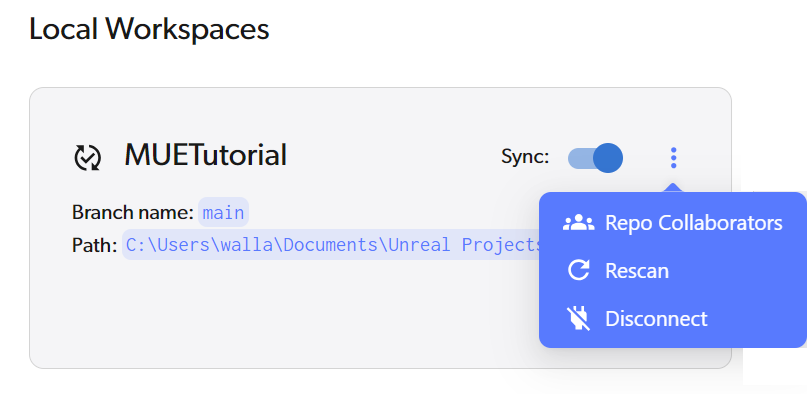
Search for the email address of the person you want to invite and select Send invite.

The second collaborator will need to accept the invitation sent to email. Then, in their Diversion desktop app, they will see the new repository appear. Select “Clone Repo”
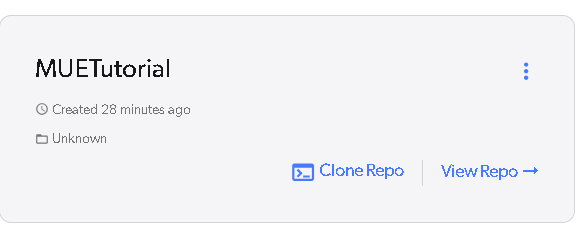
Navigate to where you would like to install the project. Select Clone, and the download will begin. Once the download is complete, you are ready to get started.
Connecting Project to MUE
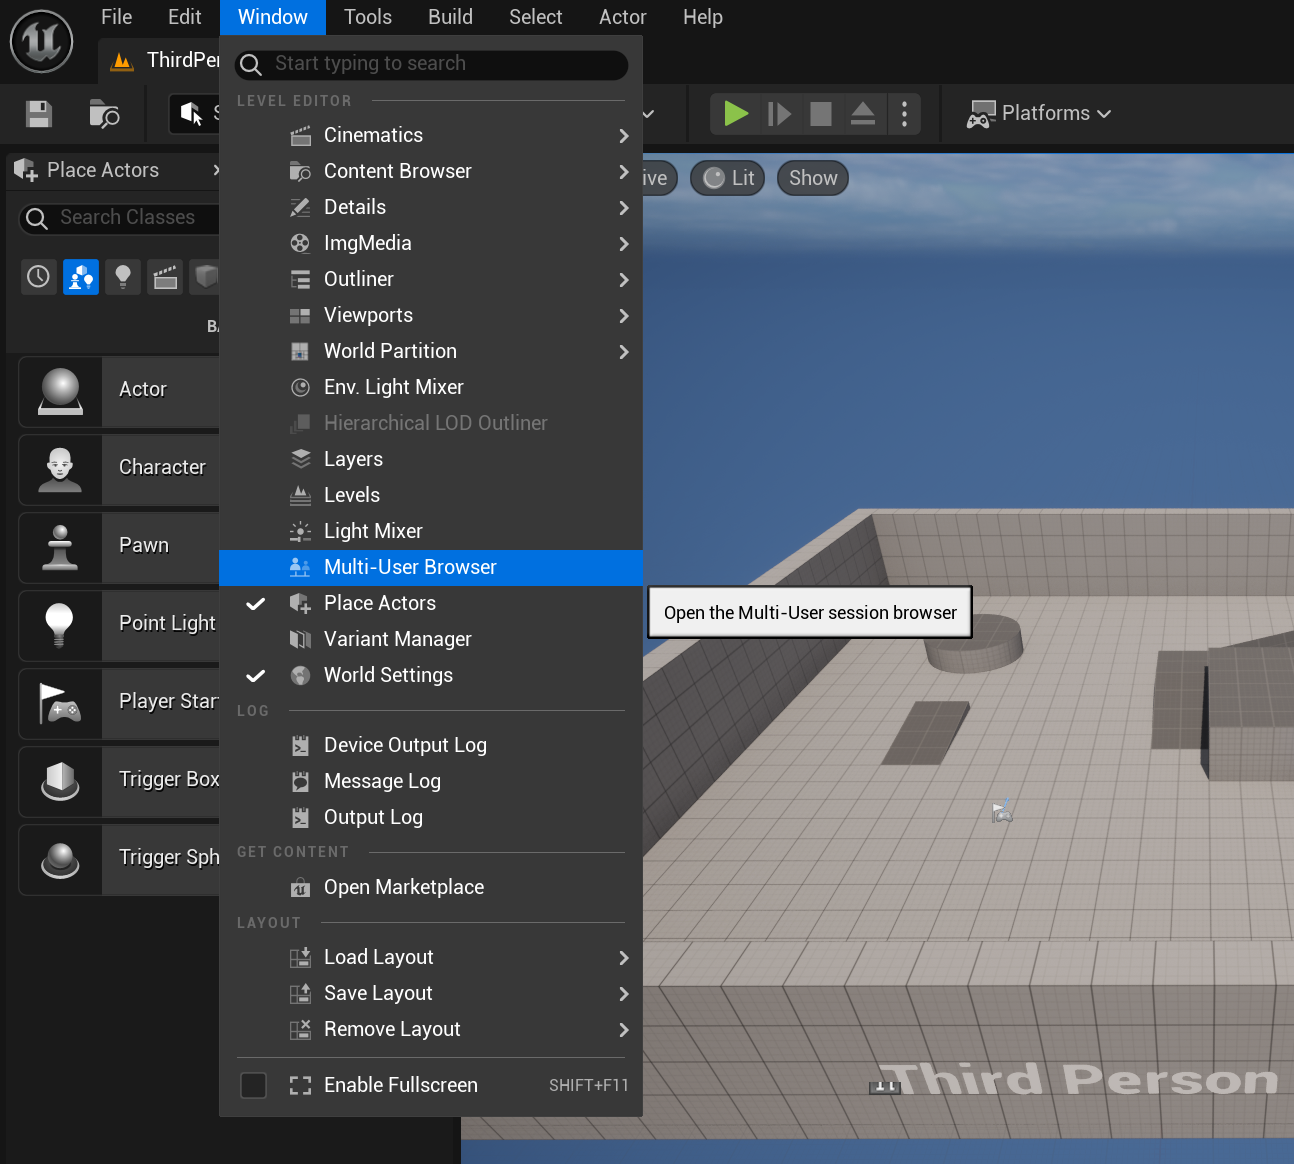
In the UE5 editor, select Window and then Multi-User Browser to open the MUE interface.
One user will need to create a server for all other users to connect to. The person who will host the server should select Launch a Server in the center of the window.
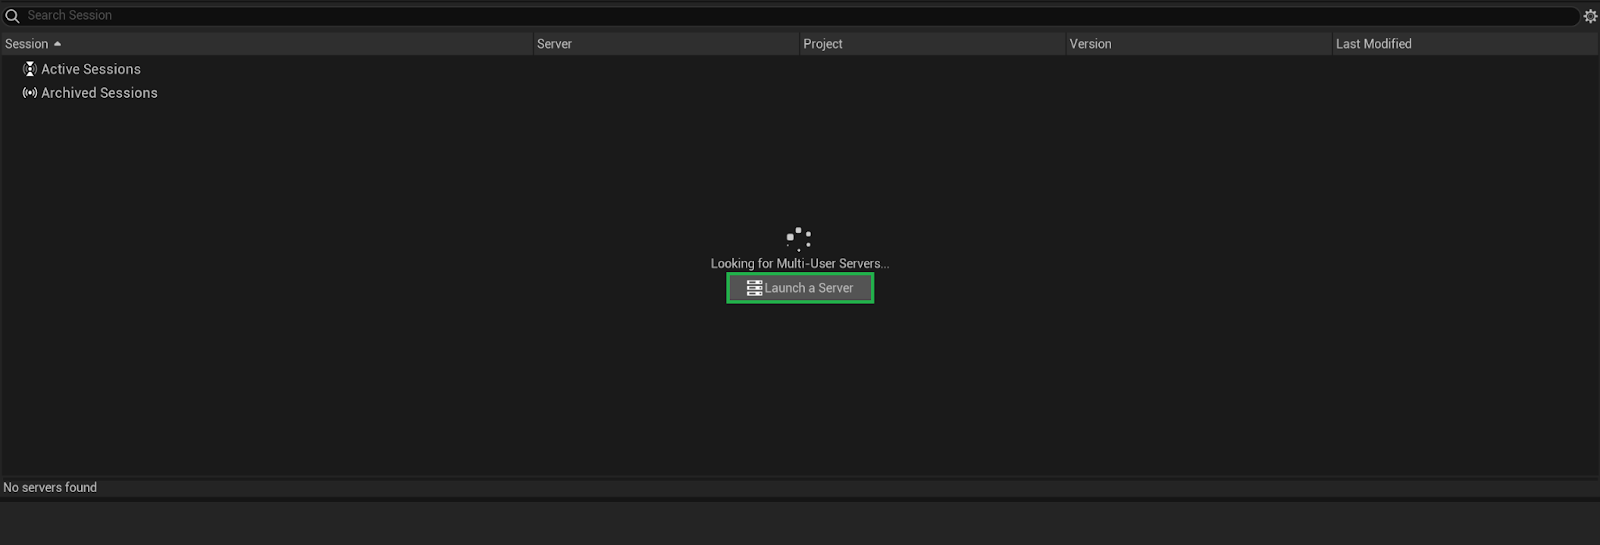
Connecting Project to MUE
A new window will open showing the list of sessions. If no session is currently open, you will need to create one.
Creating a Session
Head back to the Mulit-User Browser window, and you will notice now that there is an option to create a session. This can be done by selecting either the button in the top-left or the button in the middle of the browser.
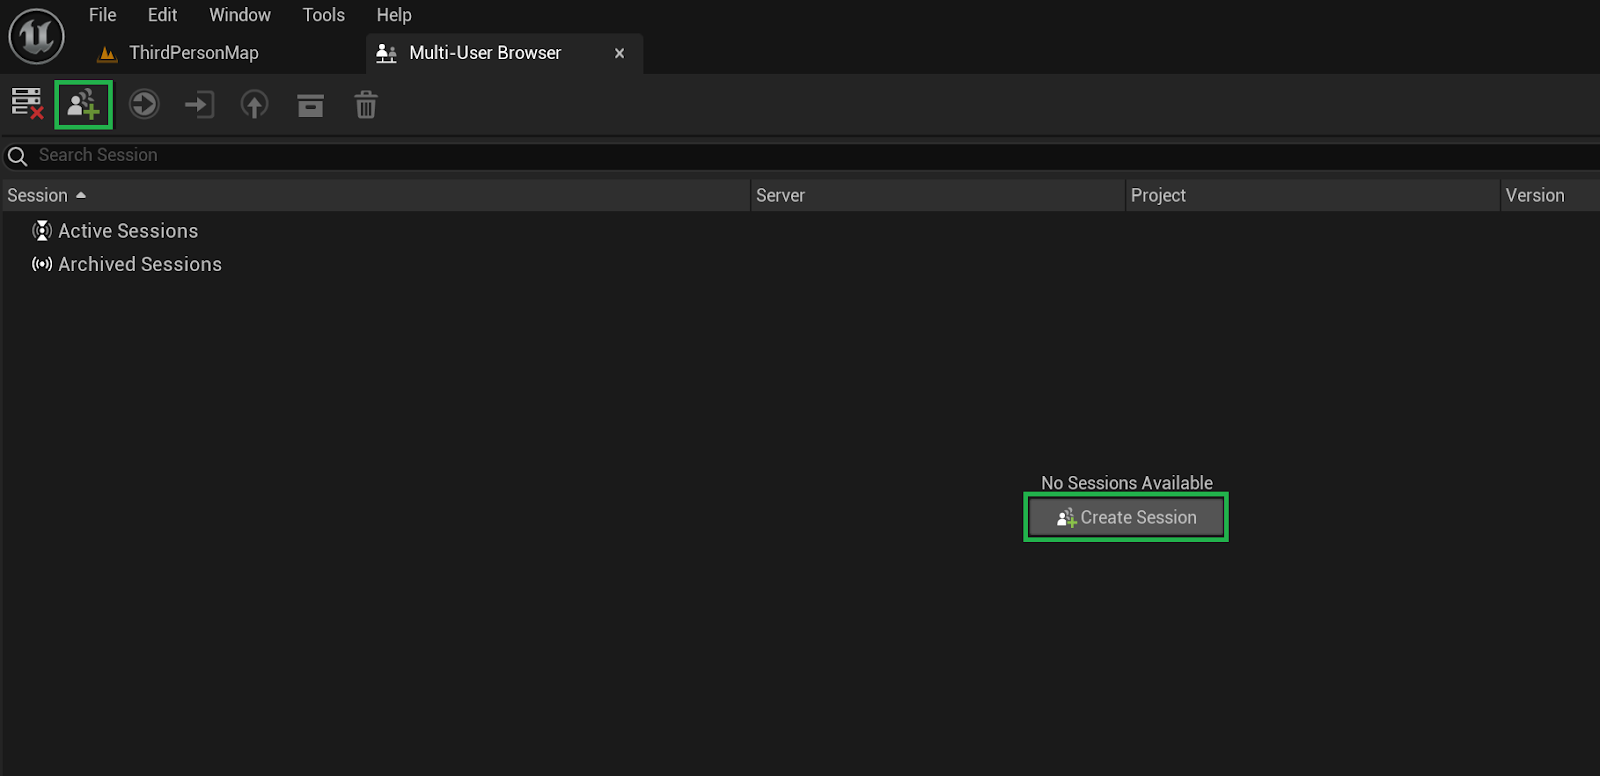
Create a name for your session and select the green check mark to start the session.

You will now see that you have joined the session.
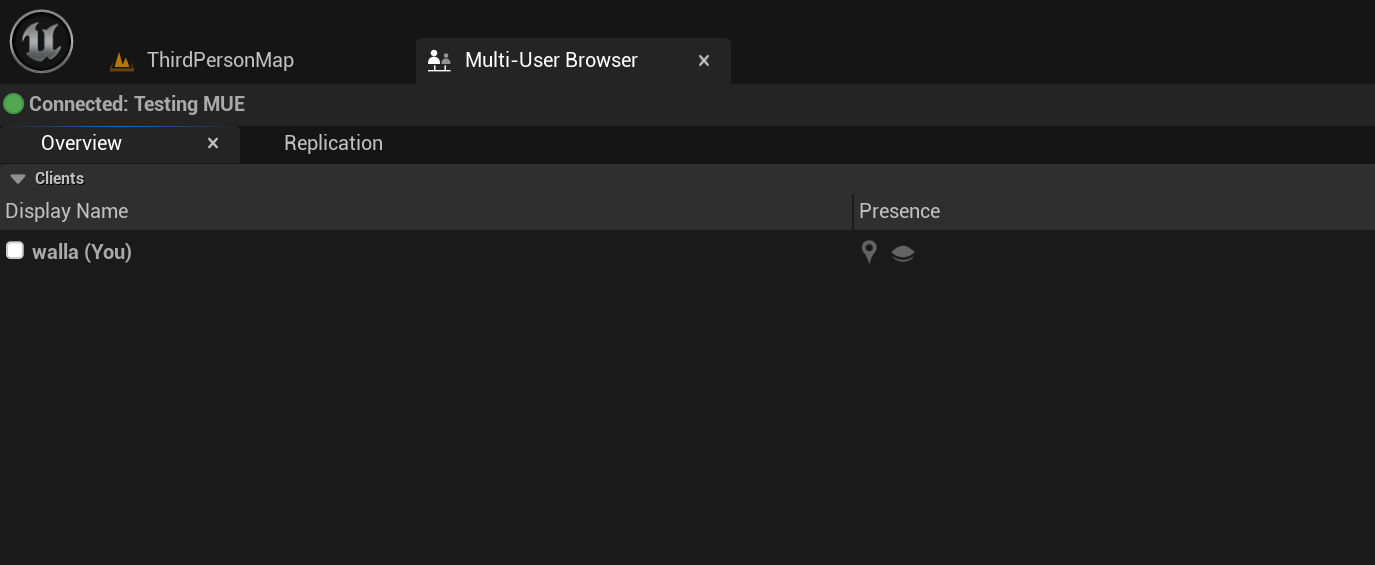
Let’s connect to a second workstation. On a second computer, open the project in the UE5 editor. Select Window and then Multi-User Browser to open the MUE interface.

You should now see the session we started on the first computer. Click the session and notice that you can see the list of clients at the bottom of the screen. Click the Join Session button to join the session.

We can now see other users in the UE5 editor, and we can see their changes to the project in real time!
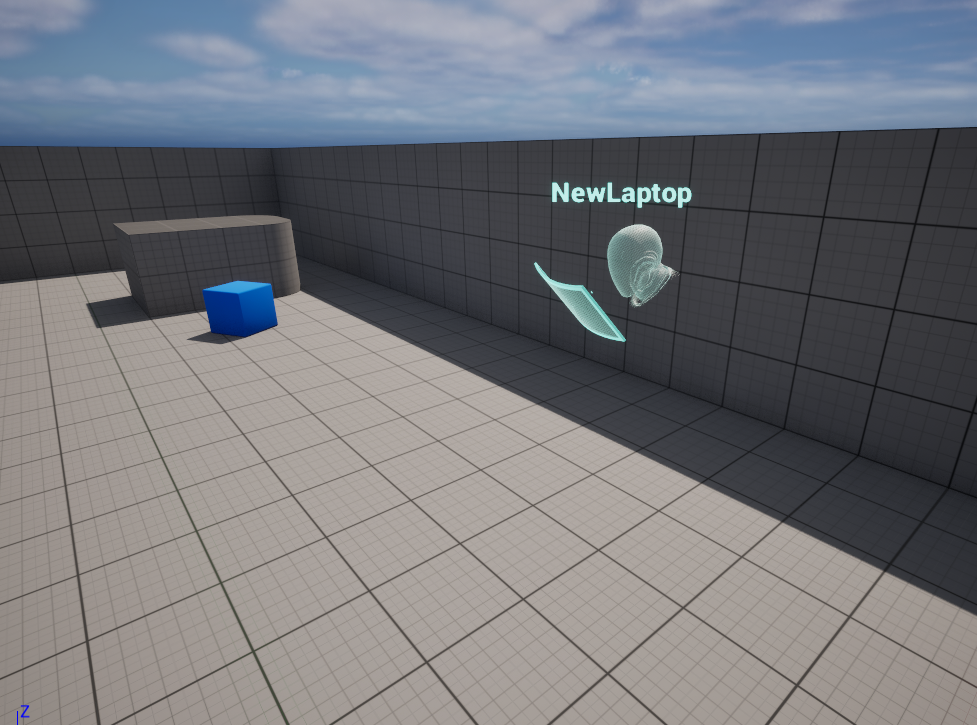
Handling MUE Transactions
The session window will give us some useful information about what is happening in the session. We can see a list of all the Clients, what Level they are currently working in, and where they are in that Level. The History section at the bottom can also provide us a list of all of the changes that have been made to the Level during that session.
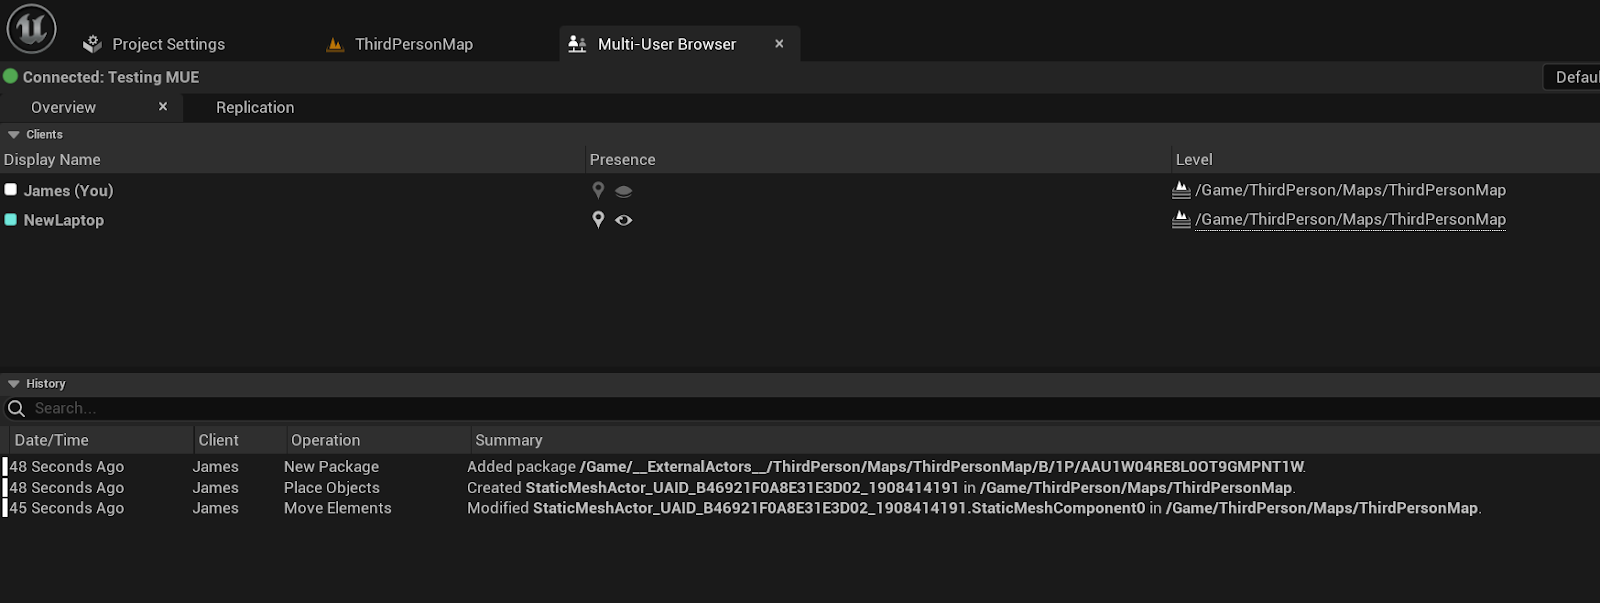
Changes are referred to as Transactions. This works by creating a starting point of the Level when the Session begins. All changes to the Level during the session are recorded from the starting point of the session.
Example
- Create a new actor
- Add a static mesh component to the actor
- Change the material of the static mesh
- Add the Actor to my Level
- Move the Actor in the Level.
All Clients will be able to see these changes in real time. Each Client can also make their own changes to the Actor in real time as well.
Saving Changes from an MUE Session
When we are finished in a session, or even periodically during the session, we will want to save the changes.
Click the Revision Control button at the bottom right of the UE5 editor, then select Persist Session Changes.

A new window will open that shows us all of the changes that were made during the session. Notice that we have the ability to submit the changes to source control directly from this window as well. You also have the option to deselect any changes you do not want to make persistent. When you are ready to move on, select the Persist button at the bottom right of the window.
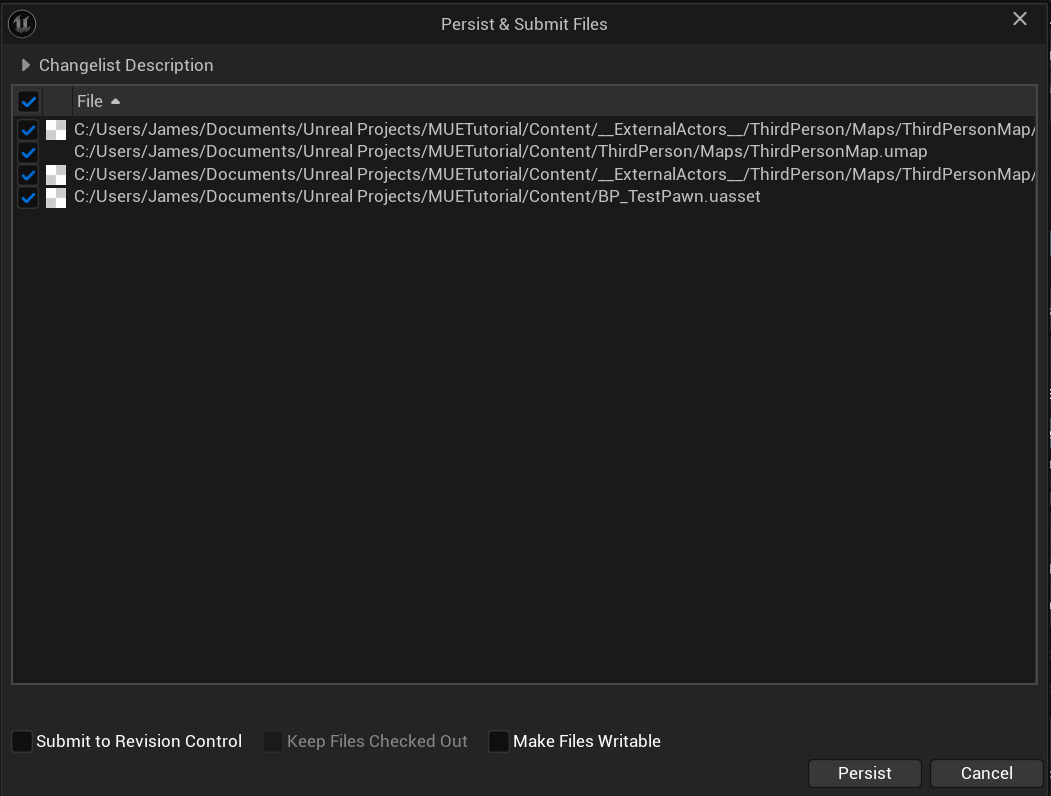
Now your changes are part of the level, and anyone not in the session (that has the most current version of the project) will be able to see the changes to the Level.
Ending a Session
When you are finished in the session, you can leave by simply clicking the Leave Session button at the top right of the Multi-User Browser window.
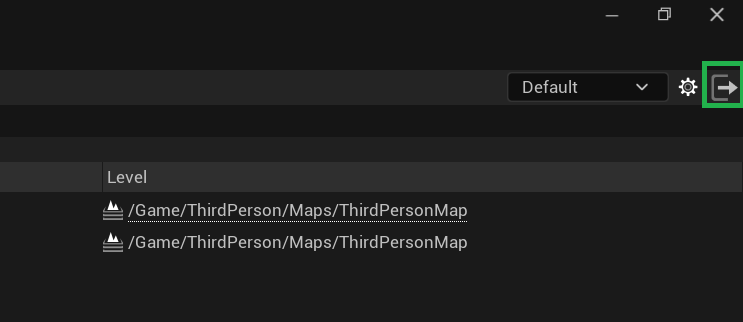
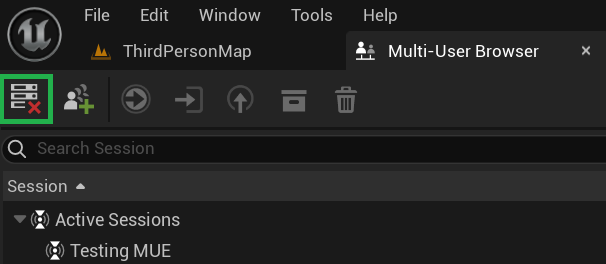
If you are hosting the Server, you can also shut down the Server by selecting the button in the Multi-User Browser window (make sure you let everyone know before you do this!).
Conclusion
The Multi-User Editing plugin will revolutionize collaboration within UE5, and its power is unmatched when used in combination with Diversion’s version control system. While there are still some bugs to work through, I think this system will become more powerful in the future, and I can’t wait to see the final version when it is out of Beta. I hope you and your team take some time to experiment with it. I think you will see the power as well.


