Managing .uasset Files in Source Control
Introduction
I love the project templates that Unreal Engine 5 makes available for users. I found these to be very helpful when I started learning Unreal Engine, because they provide an excellent example of how one would set up the foundation for a project. These projects also contain a variety of assets that will help to demonstrate the core concepts to working with .uasset files in source control. For those of you that do not know, Unreal Engine creates a .uasset file for any binary asset that is imported into the game. Binary assets are very common in game development, and they present some unique challenges in regard to source control. Diversion’s source control system has several tools that assist game developers in managing these assets.
Project Setup
For this article, I will be using Unreal Engine version 5.4.4. Let’s start by creating a fresh project using the First Person project template.

I will also be using the Diversion plug-in. This plugin allows the user to manage common source control functions like directly in the Unreal Engine Editor.
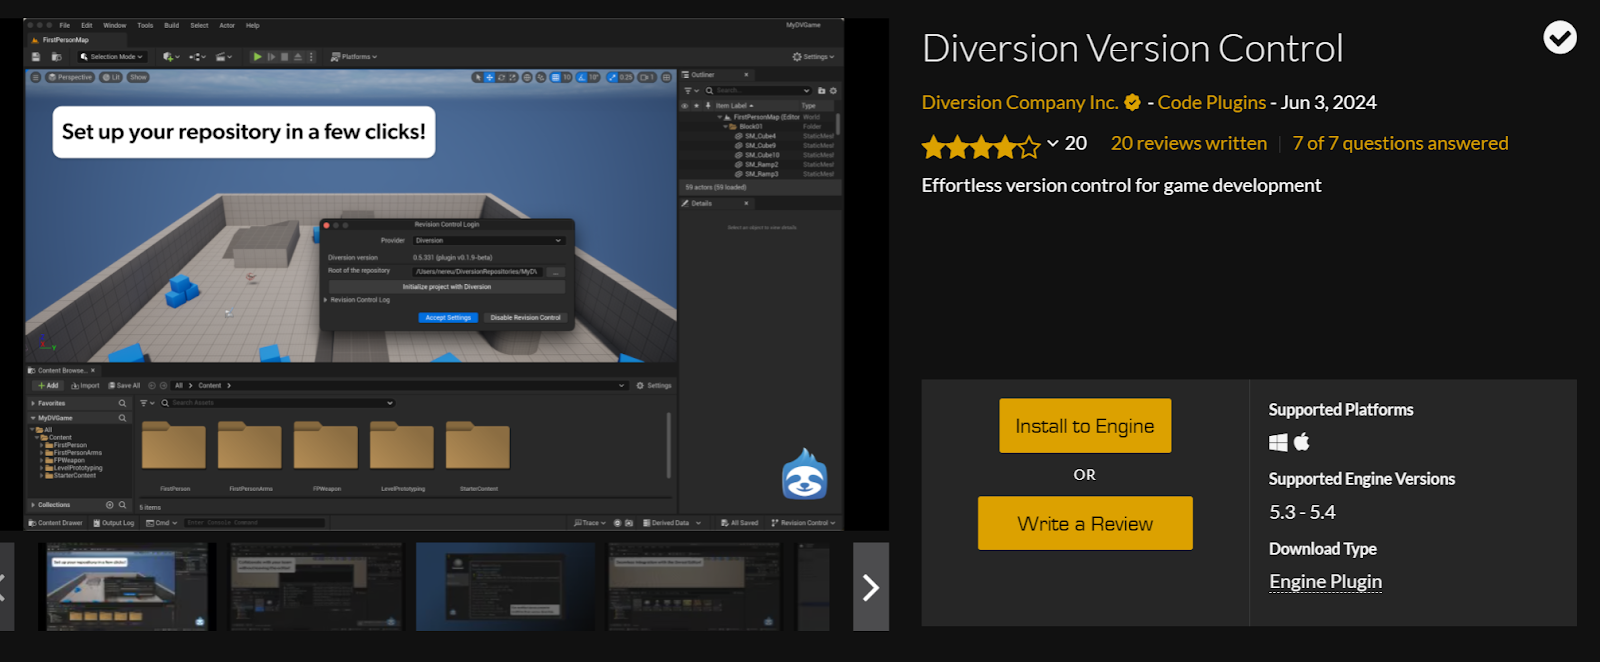
The plugin can be found for free on the Epic marketplace. For further information on how to set up the Diversion plugin, you can check out the Diversion documentation.
Once the plugin is installed and enabled in Unreal Engine, we can set up our repository directly in Unreal Engine by selecting the Source Control dropdown at the bottom right corner of the editor and selecting “Connect to Revision Control”. Then select Diversion from the Provider dropdown.
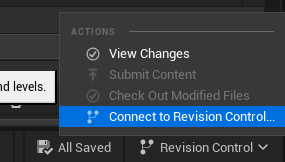
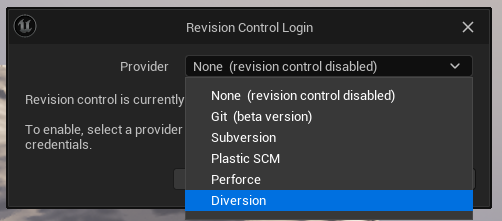
For more information on setting up your repository in Unreal Engine, check out the Diversion documentation.
Adding a New Blueprint to Unreal Engine Project
The Blueprints system in Unreal Engine allows designers to create a variety of customizable assets in their projects without ever needing to write a line of code. Developers can easily create a new Blueprint class by selecting the Blueprints icon in the toolbar at the top of the editor, and then selecting “New Empty Blueprint Class”.
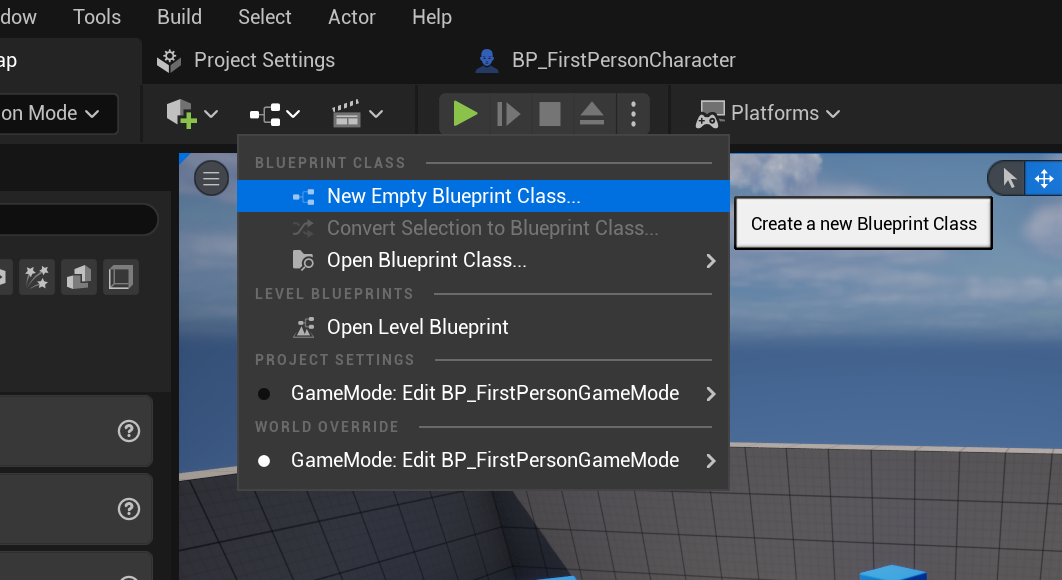
This will open a new menu where you can select from “COMMON” classes (Green) or “ALL CLASSES” (Blue).
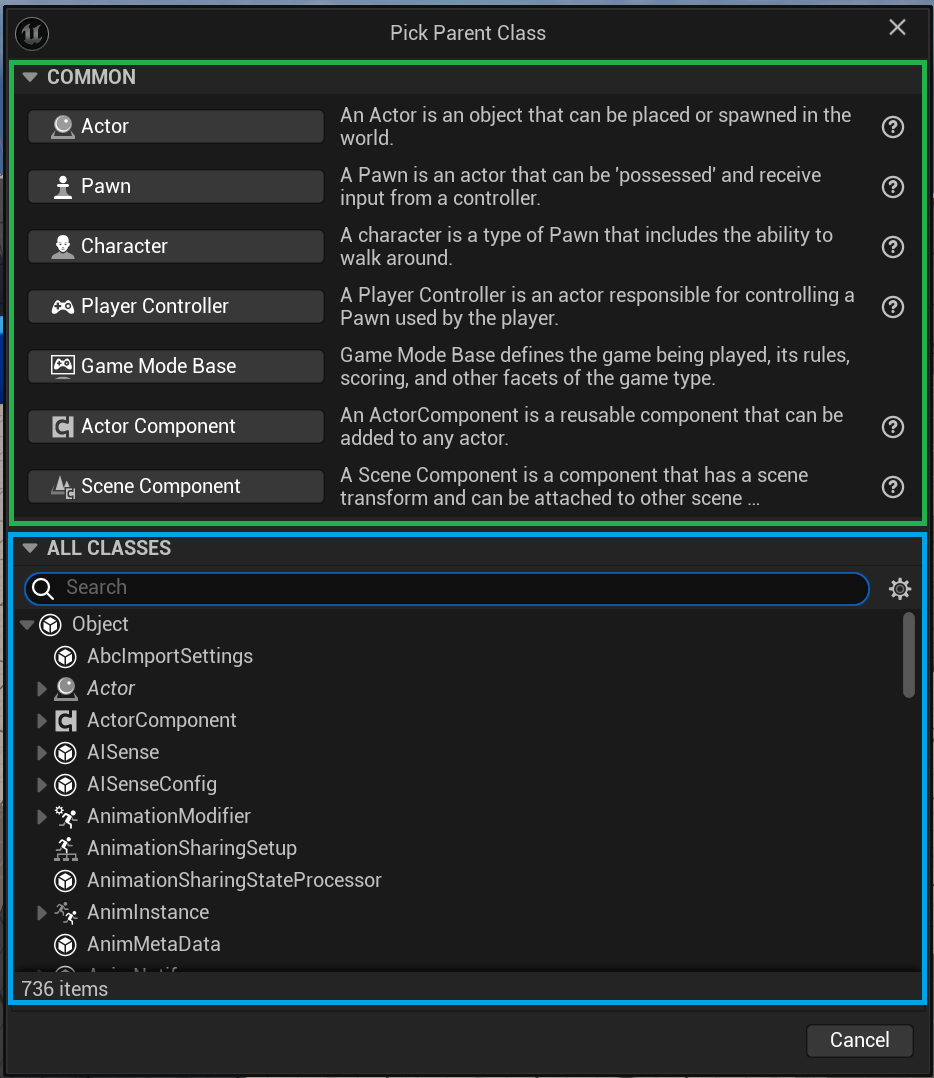
Note that once a new class is created, it will be available in the “ALL CLASSES” section of this menu.
I will use an Actor class for this demonstration and I will name my actor “BP_DemoActor”. We have created a new .uasset file. Note that my new actor has a question mark icon on the bottom right corner.
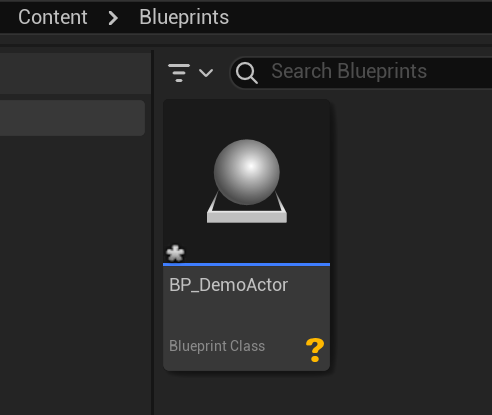
The Diversion plugin provides some helpful tips when working with files in Unreal Engine. In this case, the question mark means that the file is new and doesn’t exist on the PC disk, so Diversion won’t recognize it as an addition yet.. To add this file to be tracked in our repository, simply save the file.
Notice that the symbol changed to a green + sign. This is an indicator that the file has an “added” status in Diversion.
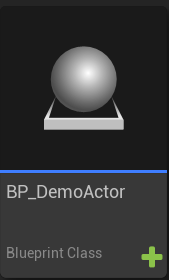
The file is also now appearing in the Diversion desktop application.

Adding an External File to an Unreal Engine Project
At some point, you will probably need to add external files to your project. The steps are mostly the same as creating a new Blueprint class once your project repository is set up in Unreal Engine. I made a basic Rifle using Blender so I could demonstrate importing an FBX file into Unreal Engine.
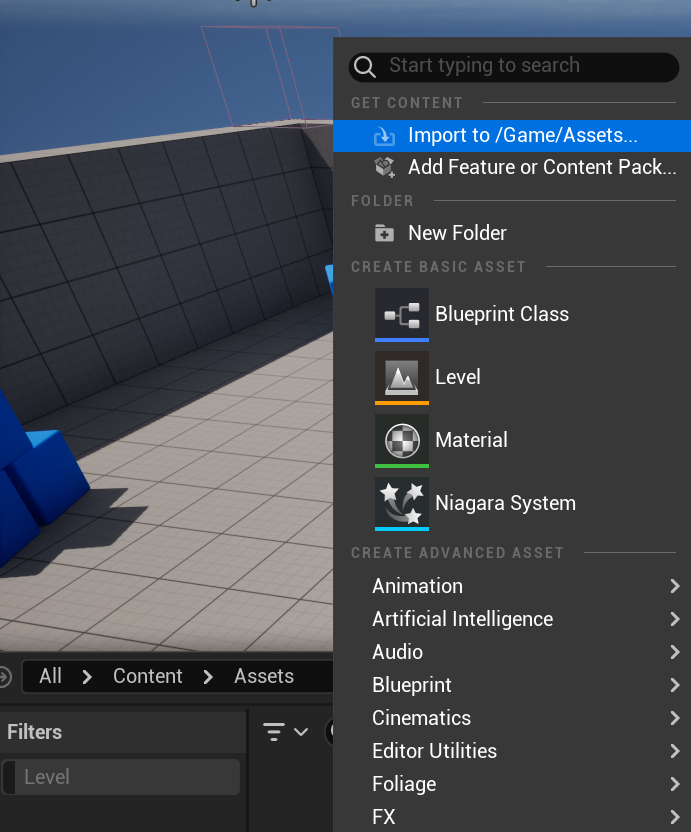
To import an external asset into Unreal Engine, we can just right click in our Content Browser and select “Import to [file path]”.
The next window allows you to modify how the assets will be imported. In my case, I want to ensure that “Skeletal Mesh” is deselected. If your mesh has a rig, you will want to select this option. I also do not want to create materials. I prefer to create the materials only when required, but you may want to import a material with your asset.

Now my assets are appearing in the Content Browser with the same yellow question mark.
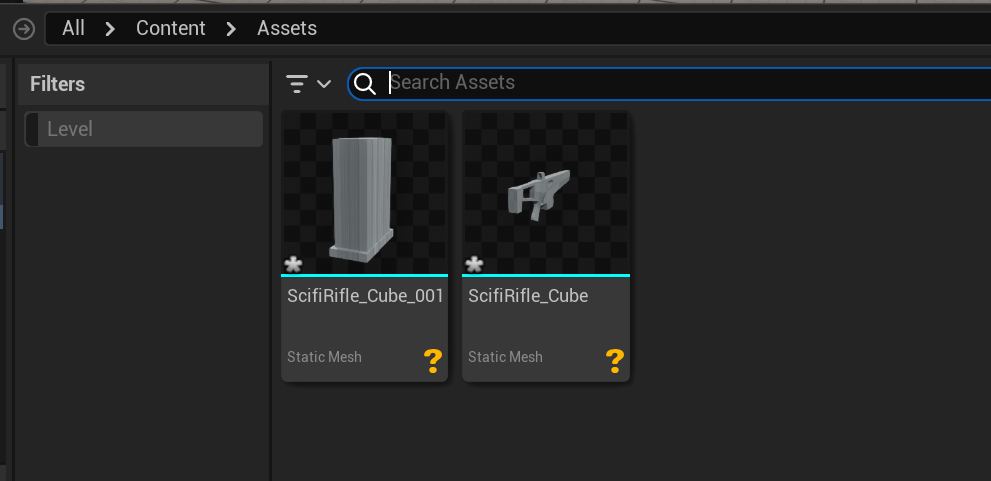
From here, we just need to follow the steps from above to mark them to be added to the repository.
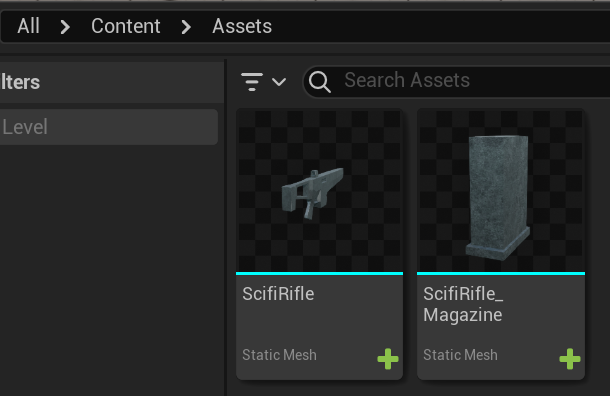
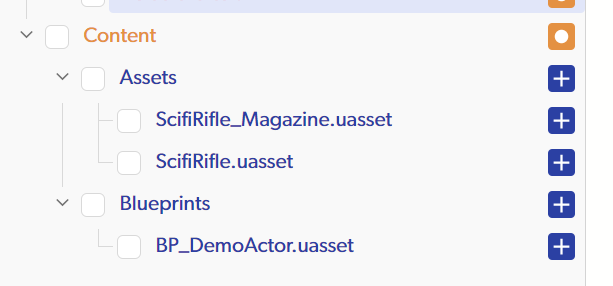
The .uasset files are also now appearing in our repository.
Managing Changes to a .uasset File
As we continue to develop our projects, it is common for assets to go through multiple revisions. New features get added/removed, Bugs are discovered, and sometimes things just aren’t working the way we want them to work. When we are creating new features, we can be fairly confident that we are the only one on the team making changes to the impacted files; however, changing files that already exist can lead to the dreaded “merge conflict” (I will discuss merge conflicts in a later section). We want to make sure we have the most up to date information when making a change to existing features. In other source control solutions, it is typical to start each work day/session by refreshing the repository to make sure we are up to date with all of the changes. Diversion loads the files every 5 seconds in the background to ensure we have the most up-to-date version of the repository.
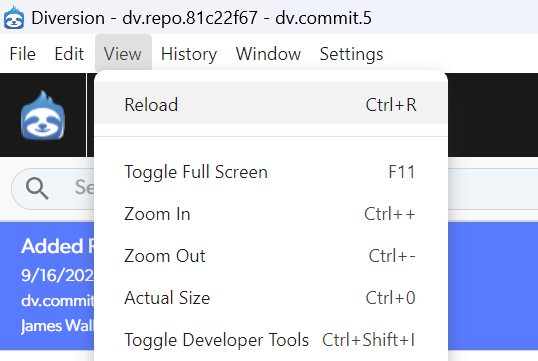
In the event that the files are not automatically updating (or if you just want to be sure), you can refresh the repository manual. The Diversion plugin allows us to do this directly in the Unreal Engine Editor by selecting “Revision Control” in the bottom right corner of the editor, then selecting View Changes. The refresh button in this menu will pull all of the changes from the repository. You can also do this through the Diversion desktop application by navigating to View and then selecting Reload. In most cases, this is not required due to the auto-reload features of Diversion.

There is a sound that plays when firing the weapon in the First Person Template project that can be very distracting when trying to build a game. For this reason, I almost always remove the sound when using this project.'
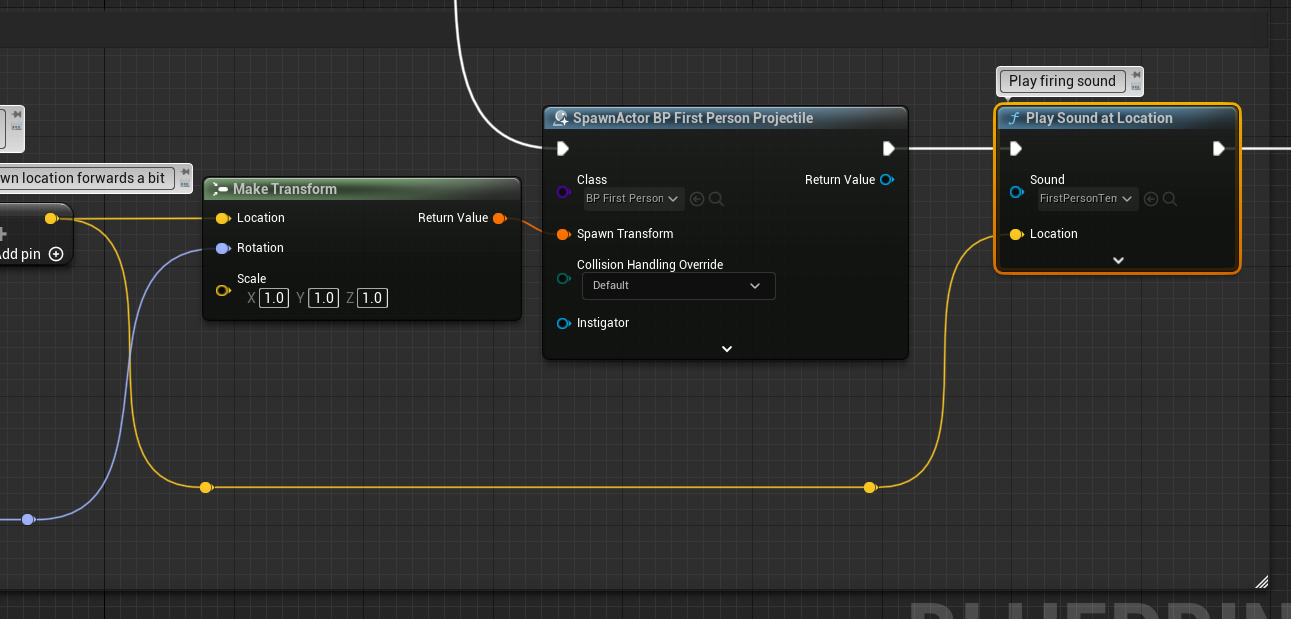
After compiling and saving the Blueprint, my asset has a red checkmark in the bottom right corner. This is the Diversion plugin telling me that there is a change to this file that hasn’t been committed to the repository yet.
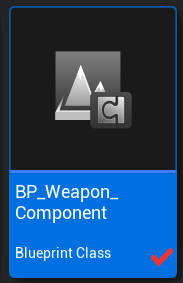
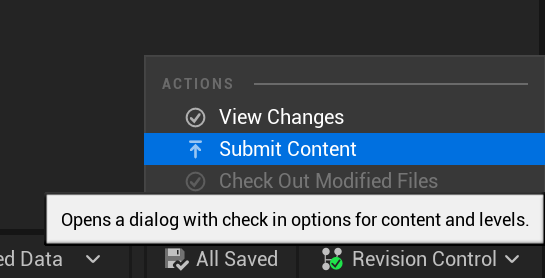
I can create a commit by selecting the Source Control dropdown in the bottom right corner of the editor and selecting “Submit Content”.
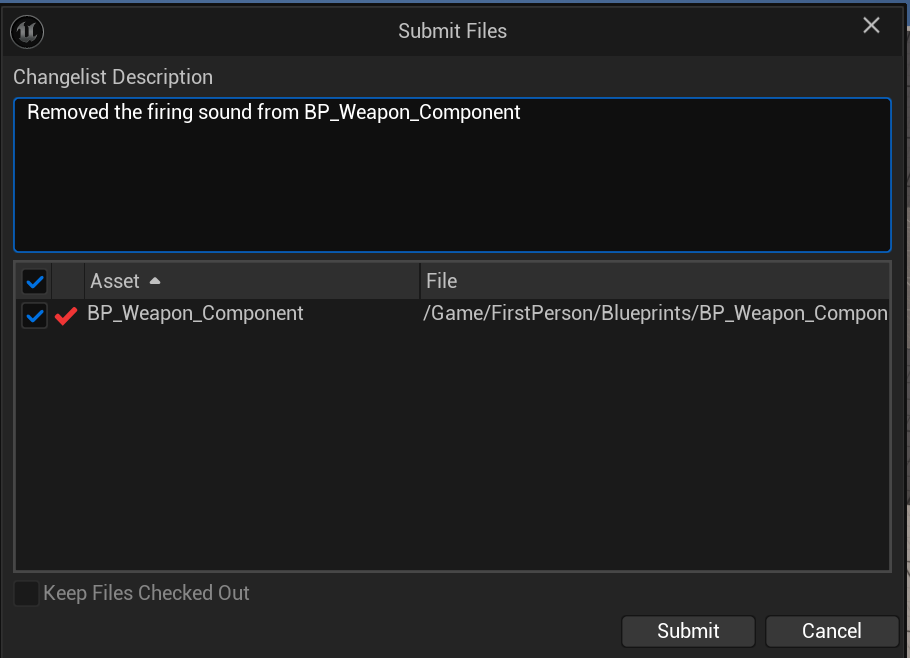
This will open a new window where I can see a list of all my changes. I can write a message explaining what changes I made and select Submit.
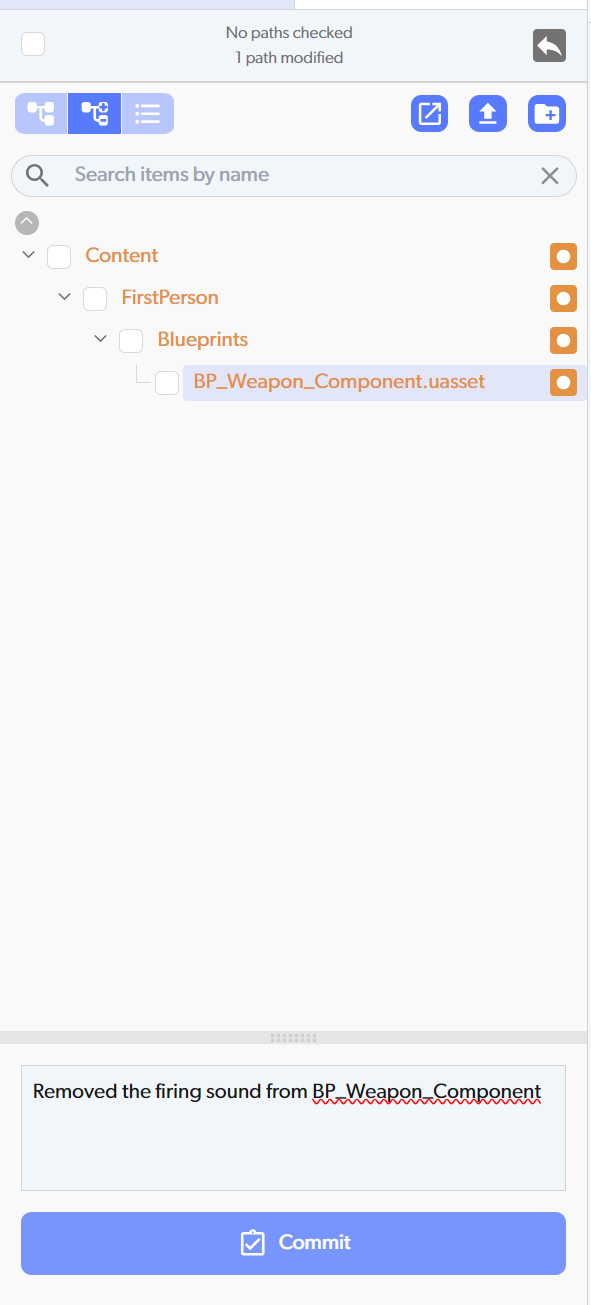
We can also do this through the Diversion desktop application by writing our commit message in the field and selecting Commit.
Merge Conflicts with Binary Files
Unless you are creating a solo project, you will probably encounter a merge conflict at some point. Merge conflicts can be mitigated by using good practices, which I will cover in the final section, but every team should be prepared to handle them in the event that they happen. The problem gets more complex with binary assets, because we cannot resolve them by moving around lines of code in a .cpp file. Resolving a merge conflict on a binary asset usually requires one file to be picked to keep and one file usually gets discarded. This can be very frustrating when someone loses hours of work. Diversion recently released an “auto soft lock” feature that can help with mitigating merge conflicts. You can read more about it in the Diversion documentation.

I created two branches and made a change on the same file on both. When I try to merge both of these into the main branch, I get a notification that there is a merge conflict. I am asked to make a decision to keep the incoming change or keep the current update to this file.

I made both of these changes, so I already know what is in each branch, but I would usually talk to my team members next to determine which branch should be kept. Having sufficient information in the commit message can help decipher which branch’s changes should be kept. At some point, I will need to make a decision though. This is done by simply selecting the button of the branch you would like to keep and then selecting Commit changes.
Tips for Preventing Merge Conflicts
Merge conflicts happen. They are a nuisance that requires the team to take time away from production to resolve, and there may be some rework, but they are usually not that serious. That being said, teams should try to mitigate them as much as possible. When I start a new project, I usually give some tips to my team members to establish some “ground rules” for trying to reduce the number of merge conflicts created.
- Communicate - Good team communication will eliminate most merge conflicts. Team members should have clear instructions on what the priorities are, and they should be aware of what others are working on as well.
- Pull Changes Every Time - Ensuring you have the most up-to-date repository can prevent a lot of needless merge conflicts. I start every day by pulling down the changes, reviewing commit history, and seeing what branches are open that may be adjacent to the work I am doing. Diversion automatically looks for updates to the repository in the background, so this can save you some extra steps.
- Commit Often - I make a point to commit my changes at the end of each day or when I have something stable. Spending several days between commits will increase the likelihood of a merge conflict.
- Modular Development - Creating modular, or component-based, classes will mitigate merge conflicts by reducing the need for multiple team members to be working on the same file at the same time.
- Trim Old Branches - I have worked on a lot of teams where each team member has a branch that they work in, and they use it throughout the whole project. This can cause your team to get complacent in making regular commits. It is a good practice to create a branch for the feature or component you are working on, and then delete the branch when the work is complete. Your team may also prefer “trunk-based development” where everyone works from the same branch. Diversion makes this easier using the auto soft lock feature, which can inform your team members where others are currently working.
About Jim
Jim is a game developer and educator who manages JimDublace Studios, a learning platform that focuses on education, mentoring, and community. He has a passion for spreading the joy of game development to people of all ages and backgrounds.


